Large-format hobbyist
A prop or statue is wider than the printer bed, so one-piece production would require an oversized machine.
Divide the object into bed-sized sections, then align and join the finished pieces during assembly.
Print preparation
When a single object is too large, fragile, or awkward to orient, split 3d model for printing into sections that are easier to arrange, produce, and assemble.
Related routes
Use the route that matches your file and preparation stage; each page covers a narrower part of the same model-splitting task.
Who it helps
Different makers split models for different reasons. The right cut strategy preserves useful surfaces while making each section easier to print and finish.
A prop or statue is wider than the printer bed, so one-piece production would require an oversized machine.
Divide the object into bed-sized sections, then align and join the finished pieces during assembly.
A helmet or armor shell needs a stable print orientation, but its curves and overhangs make a single job unreliable.
Use deliberate sections with accessible seams, flatter contact areas, and room for post-processing.
A detailed figure contains delicate projections that may fail when printed as one unsupported piece.
Separate vulnerable areas so supports, cleanup, and painting can be handled without damaging the main form.
A replacement component must be printed in a constrained orientation or assembled around an existing mechanism.
Create practical sections that expose mating faces and keep critical dimensions easier to inspect.
Working method
A good 3d splitter process starts with the physical constraint, not an arbitrary cut. Choose the workflow that matches the way the finished object will be printed and assembled.
Identify the usable bed area, the safest orientation, and the surfaces that must remain visible. Mark likely seams away from focal details and high-stress edges.
Split the 3D model into logical sections, then inspect each new boundary for thin walls, trapped supports, sharp overhangs, and surfaces that will need joining.
Send the sections through your normal slicer, check their scale and orientation, and make a small test print when a fit, tolerance, or alignment feature matters.
Before you print
Splitting geometry solves a production problem, but it does not guarantee that every resulting section is printable or suitable for a particular use.
Open edges, self-intersections, inverted normals, or non-manifold areas may remain after a model is divided.
What to do instead
Run the resulting parts through your usual mesh-repair and manifold checks before slicing.
A mathematically convenient cut may cross a visible face, weaken a thin area, or create an awkward sanding line.
What to do instead
Review seam placement against appearance, strength, support access, and assembly order.
Small scale errors, printer calibration, material shrinkage, and clearance choices can keep separated parts from mating correctly.
What to do instead
Use measured reference dimensions and print a small fit test for important joints.
The split output still needs appropriate wall thickness, support strategy, material settings, and supervision on the selected printer.
What to do instead
Validate every section in your slicer and follow the operating guidance for your equipment and material.
Print planning
The comparison is not about making more parts for its own sake. It is about trading assembly work for better control over size, orientation, support, and finishing.
| Single-piece model | Split model for printing | |
|---|---|---|
| Printer bed fit | Must fit within the available bed envelope as one object. | Sections can be arranged within the usable bed area. |
| Orientation choices | One orientation governs the complete object. | Each section can use a more suitable orientation. |
| Support access | Internal or hidden areas may be difficult to reach after printing. | Parts can expose surfaces that are easier to support and clean. |
| Visible seams | No assembly seam between sections. | Seams require placement, filling, sanding, or intentional design treatment. |
| Assembly effort | Little or no joining work after production. | Requires alignment, bonding, fastening, or another joining method. |
| Failure impact | A failed job may waste the entire object. | A failed section can sometimes be reprinted without remaking every part. |
| Quality control | One large result can be harder to inspect during production. | Each section can be checked before the complete object is assembled. |
Expected result
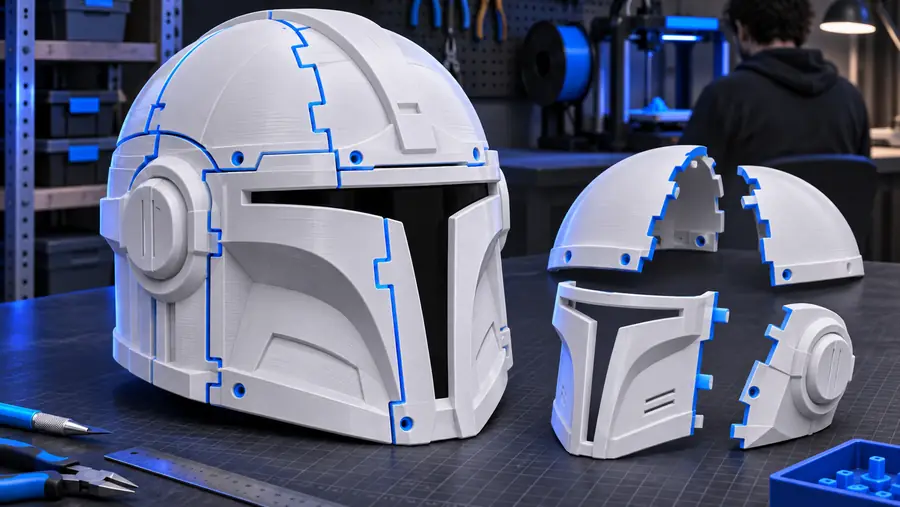
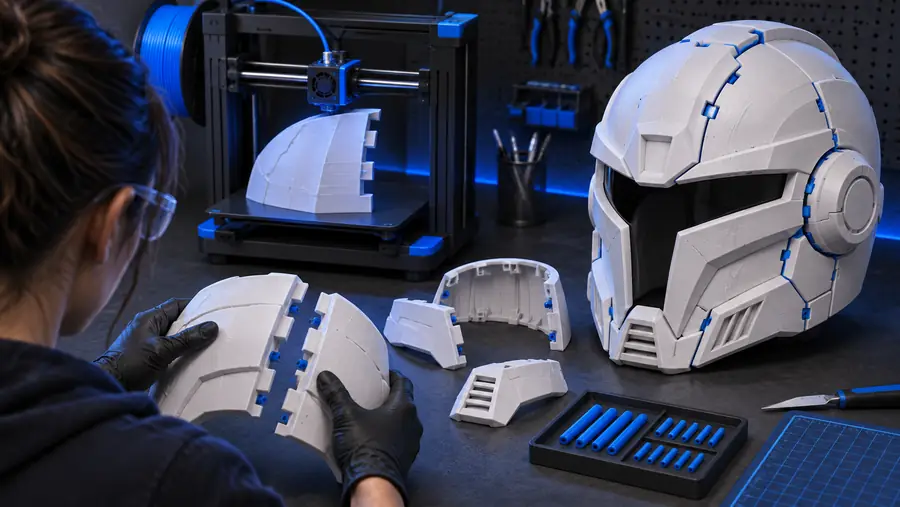
The final seam quality depends on the cut layout, printer settings, material, and finishing method.
Before: one-piece modelAfter: planned print sectionsReady to prepare
Use a 3d splitter workflow when the model is too large, delicate, or awkward to produce in one piece. Start with the physical constraint, divide around useful surfaces, and inspect every section before committing to a full print.
Scenario FAQ
Start by identifying the printer bed limits, the best orientation, and the surfaces that should remain visible. Divide the model along practical seams, inspect each section for printable walls and support access, then test the parts in your slicer before a full print.
The best split balances bed size, print orientation, seam visibility, strength, and assembly access. Place cuts on less visible or naturally joined areas where possible, and avoid creating thin edges or difficult internal surfaces.
Yes, an STL can be divided into separate sections when its mesh and the chosen split are suitable for processing. After splitting, check each output for manifold issues, correct scale, wall thickness, and a clean export before slicing.
For major structural divisions, split the model before the final slicer setup so each section can receive its own orientation and support strategy. The slicer should still be used afterward to verify placement, scale, supports, and the actual toolpath.